4 Steps To Running Profitable Google, Yahoo Or Bing Ad Campaigns
2 Targeting Strategies I Love About Twitter Ads
3 Tips To Maximizing Your Organic Reach With Facebook
3 Types of Twitter Ads I Run To Get Traffic To My Blog
CLICK HERE To Master 21 Of My Top Converting Lead Generation Methods Now
3 Types of Twitter Ads I Run To Get Traffic To My Blog
Twitter is a social media site where users interact and post 140 character messages or ‘tweets’.
From a marketing perspective, Twitter is powerful because you can target users and jump into their conversations based on different keywords that you choose.
The keywords for Twitter are the actual conversations and tweets that are happening in real time! Talk about targeted…I take full advantage of this when it comes to driving traffic to my blog.
There are 3 main types of Twitter ads I use to drive traffic to my blog.
1. Twitter Promoted Tweets
2. Twitter Website Cards
3. Twitter Video Ads
Below I will walk you through each type of Twitter ad, the advantages, and give you a few tips on how I leverage Twitter ads to get traffic to my blog.
I also created a Twitter Course that goes into depth on not just setting up a Twitter Ad, but also the strategies that make your Twitter Ads convert into sales. Click HERE for more info.
1. Twitter Promoted Tweets
Twitter Promoted Tweets are just like any other tweet. The only difference is advertisers can pick a normal tweet and pay for that tweet to reach a wider group of users than just your current followers.
Let’s pretend I want to run a Promoted Tweet and drive to one of my blog posts.
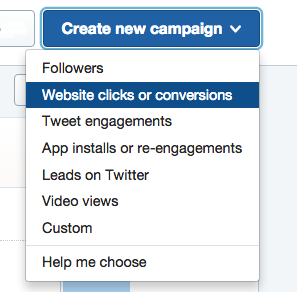
You’d first access your Twitter Ads dashboard and click on “Create new campaign” then “Website clicks or conversion”.
This will take you to a page where you set up your ad. There are 4 steps:
1. Overview
2. Audience
3. Budget
4. Creatives
Overview – This step is where you name your campaign and set how long you want to run your campaign for.
Audience – This step is where you decide who you want to target for your Twitter Promoted Tweet. You can target keywords, followers, other Twitter user followers, behaviors, location, etc. Choosing an audience is a crucial step to your ads success, if you want more information on how to choose an audience, click HERE.
Budget – This step is straightforward. Set a total budget for the entire campaign as well as a daily budget. For example, if you wanted to run an ad for 5 days and spend $10 a day, you would set your daily budget at $10 and your total budget at $50.
Creatives – This is where you choose which previous tweet you want promote.
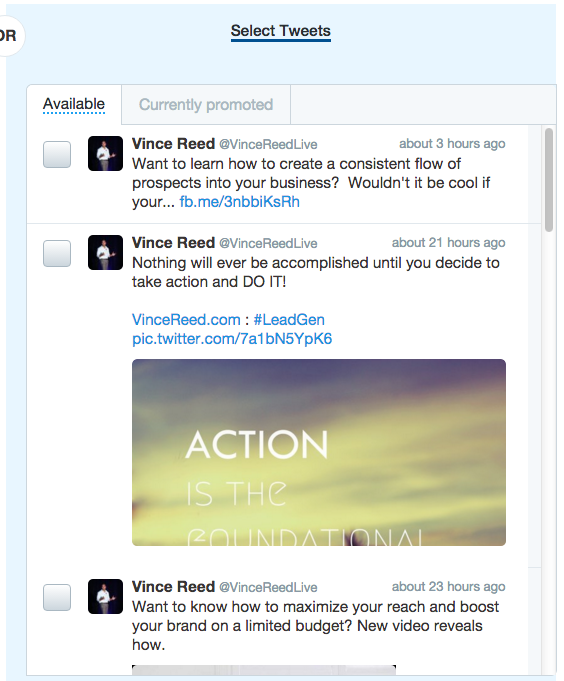
Twitter also gives you the option to create a new tweet or a website card, but I’ll save that for the next ad type.
Once you have chosen your tweet, click launch at the top and Twitter will review your ad then you’ll be good to go!
2. Twitter Website Cards
Twitter Website cards are very similar to Twitter Promoted Tweets, except they come attached with an image + a call to action.
Here an some example of Twitter Website Cards:
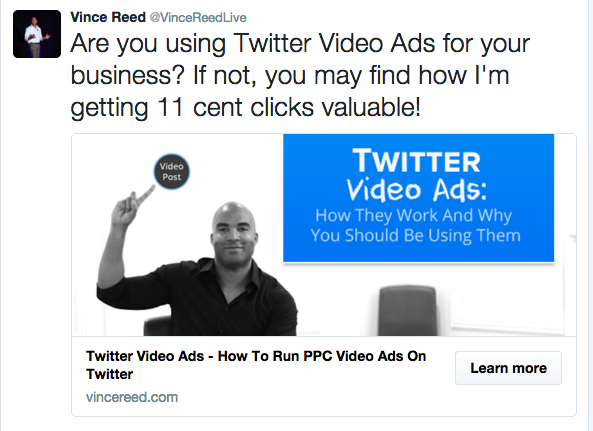
As you can see, Twitter Website Cards look different than Twitter Promoted Tweets. The image and the clear call-to-action looks really nice and helps your tweet stand out in the crowd in the Twitter Newsfeed.
In order to create a Twitter Card, you take the same exact steps as I mentioned above when creating a Twitter Promoted Tweet. The only difference is when you get to the creative section of creating your ad.
You can also create a website card before setting up your actual ad. This is the way I do it and recommend.
You’ll want to click on Creatives in the Twitter Ads Back Office and click Cards.
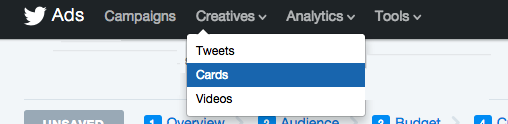
Once you click on cards, you’ll want to click on Website then Create Website Card.

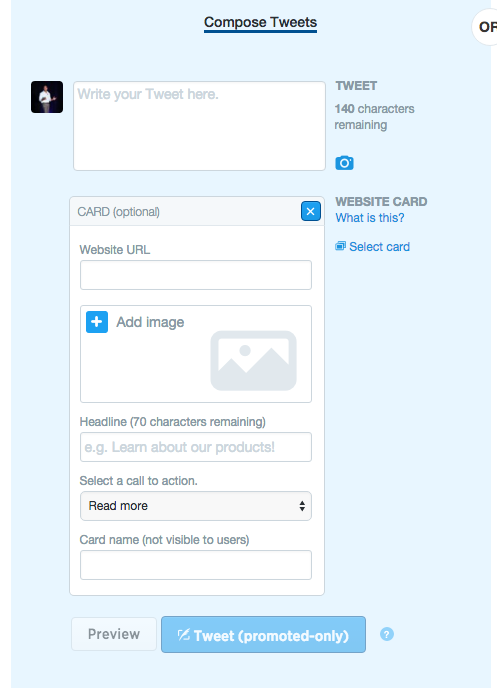
This is where you create your card. As you can see below, you can upload an image, enter the URL of your website, choose a headline, and create a call to action.
Image dimensions must be at least 800 pixels wide and 320 pixels high.
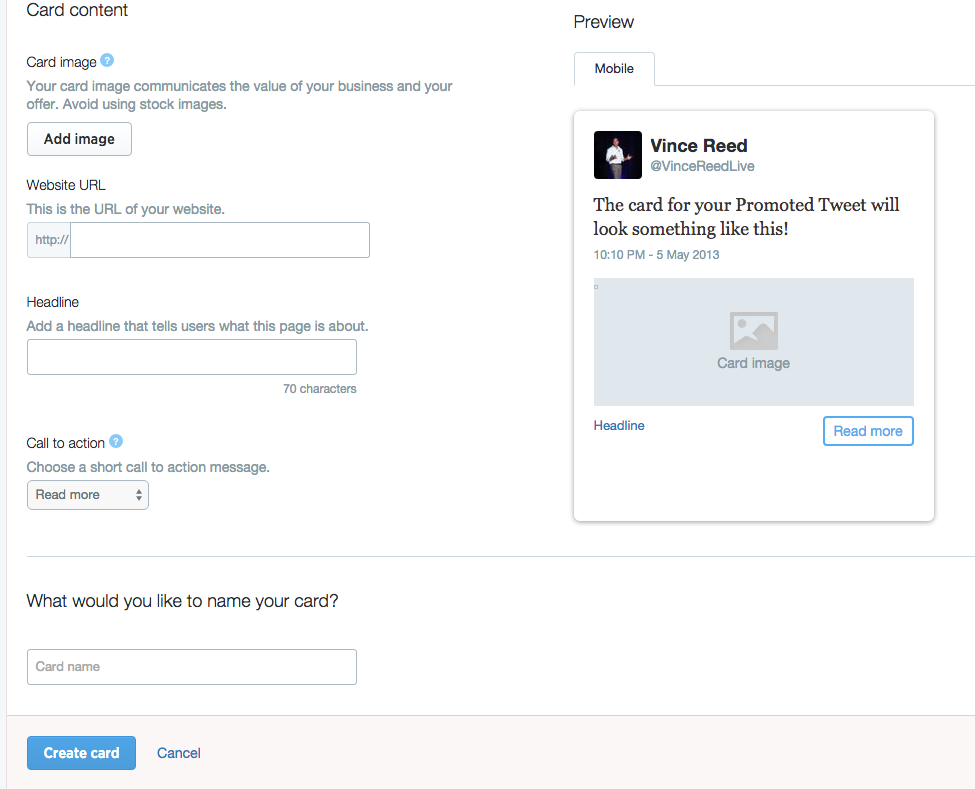
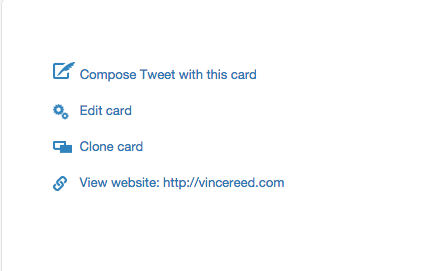
Once you have filled in all necessary card content, click create your card. You then can compose a tweet with your newly made Twitter Card.
You now have the option to tweet the card organically to your Twitter Timeline, or you can choose the Promoted-Only option (meaning you want to run an ad with your card).
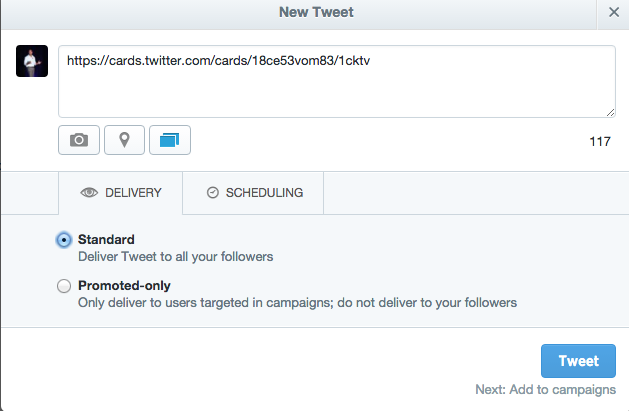
Once you select promoted only, choose the campaign you want to run and you are good to go!
If you are stuck on what to say or who to target, I created a course called Twitter PPC Secrets – Click HERE for Info.
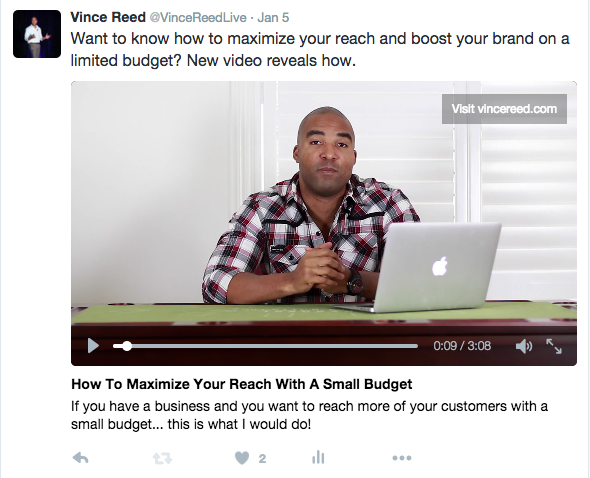
3. Twitter Video Ads
Last we have Twitter Video Ads. I truly believe Video is the future of marketing, so I highly recommend taking full advantage of Twitter Video Ads.
Here an example of Twitter Video Ad I Run:
To run a Twitter Video Ad, click on Create New Campaign inside the Twitter Ads Manager.
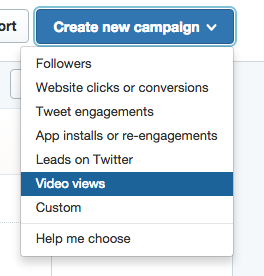
Just like the previous Twitter Promoted Tweet and Twitter Website Card, you will have 4 steps: Overview, Audience, Budget and Creatives.
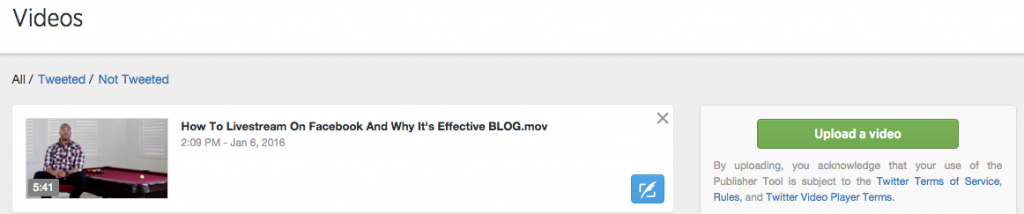
When you get to creatives, you will see the image below:
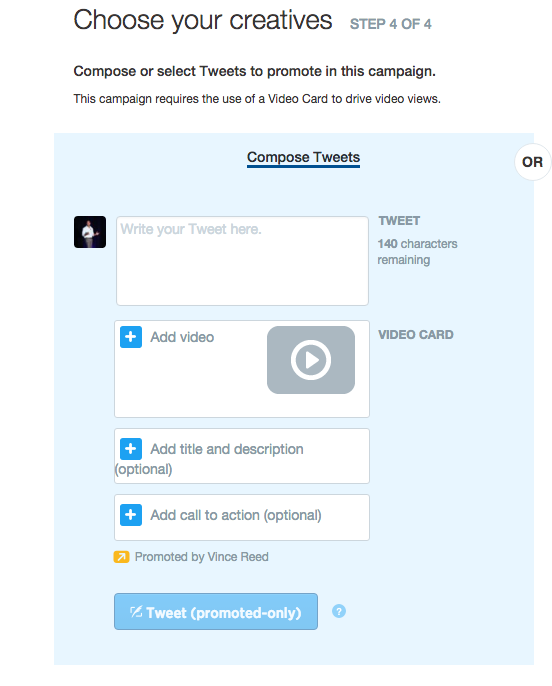
This is where you will fill out the designated fields and upload the video you want to run an ad too.
You can also create your video ad from the creatives option.
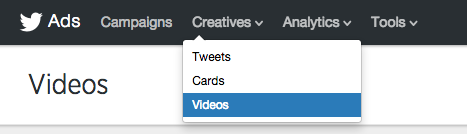
Then you want to click on “Upload A Video”.
Upload your video and it will take you to a page that looks like this:
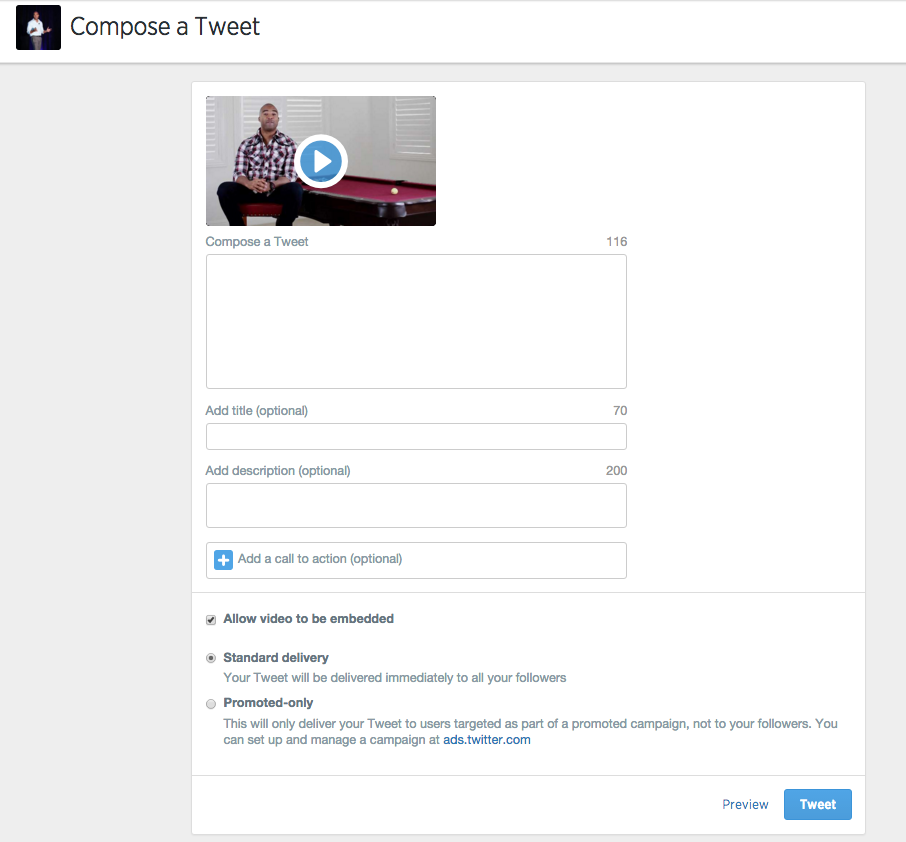
Fill out all of the necessary fields, choose Promoted Only, pick which campaign you want to attach your new Twitter Video Ad too! It’s that simple.
In conclusion, Twitter is a strategy I have been using for years and as you can see, Twitter is not only simple, but also extremely effective.
Twitter is a flagship platform and if you want to dive deeper into Twitter training and become an expert, CLICK HERE For More Details
If you got value from 3 Types of Twitter Ads I Run To Get Traffic To My Blog…
PLEASE Comment Below!
How To Stream Live Video On Facebook
CLICK HERE To Master 21 Of My Top Converting Lead Generation Methods Now
How To Stream Live Video On Facebook
Facebook has done it again. This shouldn’t be a surprise, but they have released an awesome new way to connect – have you ever heard of Facebook Live?
If not, Facebook Live now lets you connect with your friends, fans, family and followers by sharing real-time video of what you are doing/seeing.
In other words, you now have the capability to share anything in real time with your Facebook family – as long as you have your smart phone.
This is an absolute game-changer… and I’m here to walk you through the steps of how to stream live video so you can take full advantage of this awesome marketing tool.
Who Has Access To Facebook Live?
Facebook Live starting making noise around late summer of 2015. It was first introduced to a select amount of people, mainly celebrities and athletes with verified Fan Pages.
Soon enough Facebook Live was available to all verified fan pages… and that’s when I began to take full advantage of this amazing marketing tool.
Just recently, Facebook announced that all Facebook users would be able to leverage Facebook Live with their personal pages, and they have lived up to their word.
I’ll show you how to access it here in just a second, but I want to make sure I’m clear: All personal Facebook accounts will be able to access Facebook Live. Facebook Business Pages/Fan Pages will still need to be verified to access Facebook Live.
Step 1 – Set Up Your Live Stream
Facebook Live can be accessed through the Facebook App by clicking on Status (image below) or through the Facebook Mentions App.
I only recommend downloading the Facebook Mentions App if you are going to leverage Facebook Live with your verified Business Fan Page. Otherwise, just stick to using the normal Facebook mobile app.
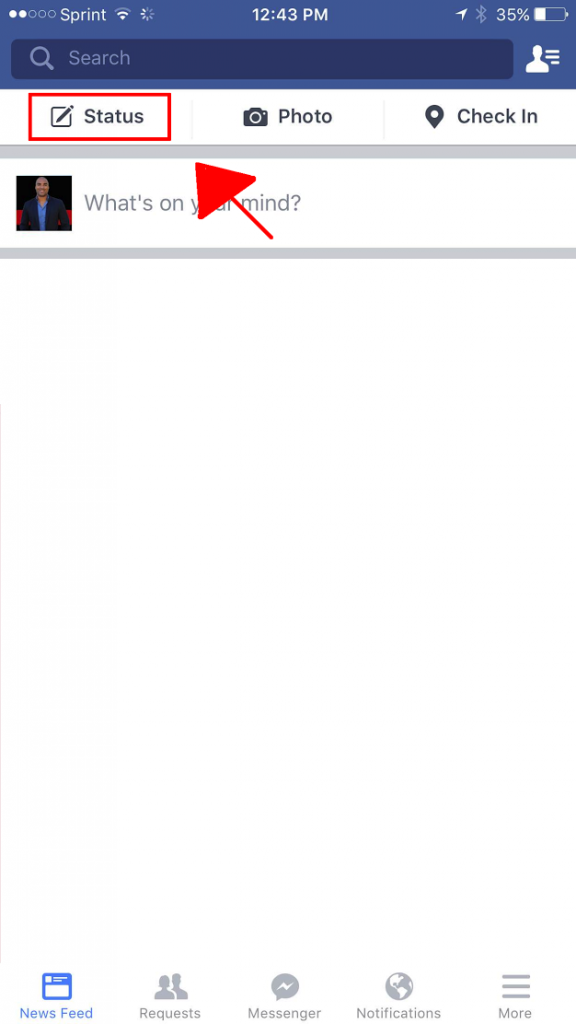
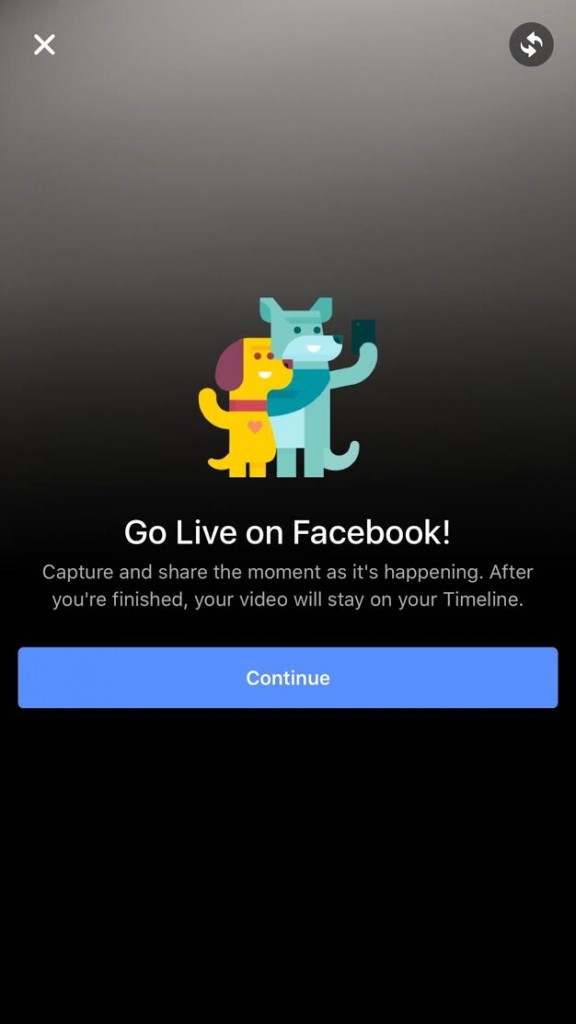
Once you click on status, you’ll see at the bottom a little blue blurb pop up that reads ‘New! Record and Share Live Video’. Click it.
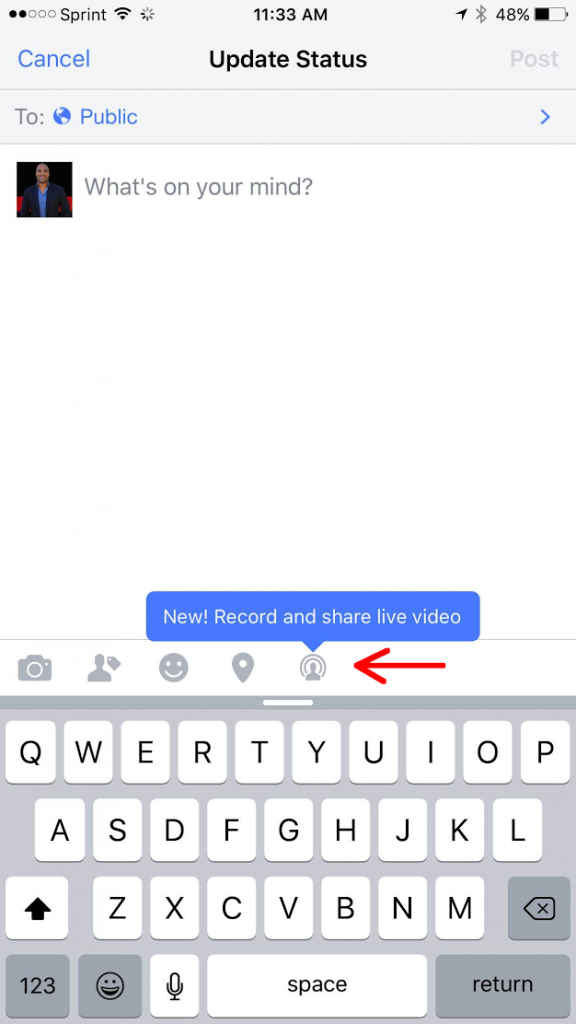
You are now ready to go! Click the continue button and it will take you to the final step before you start your live stream. This is where you want to name your Live Stream.
I recommend naming your Live Stream something that isn’t too long of a title but reflects exactly what you are going to be sharing. This is crucial because your title is what everyone (friends, family, fans) is going to see in the newsfeed.
Some example titles of past live streams I’ve done are:
The more ‘to the point’ your title is and the better you understand the community you’re serving, the odds of your Facebook Livestream being a massive success are only going to be high.
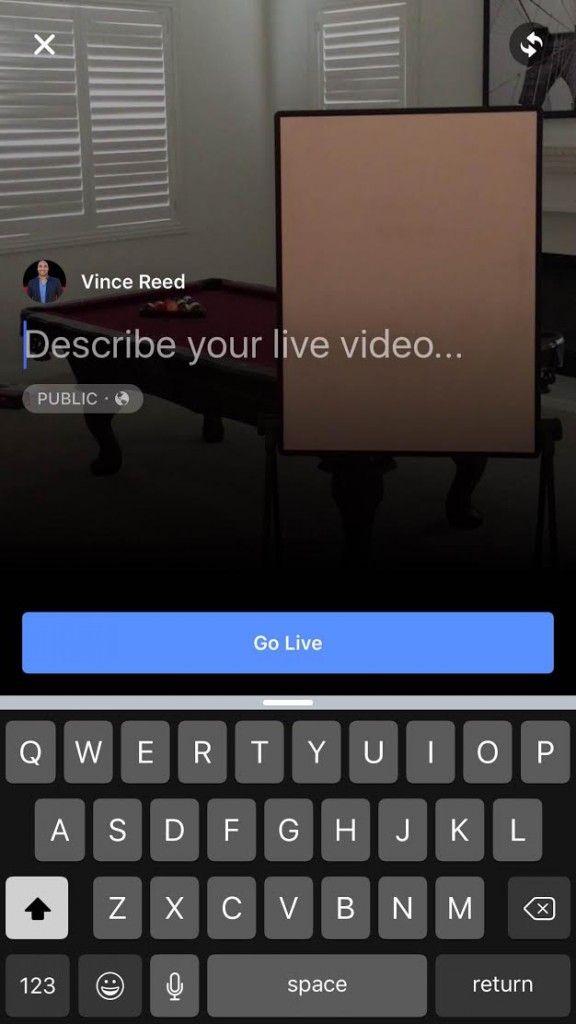
Step 2 – Start Your Broadcast!
Your title is now complete. The next step is to click GO LIVE. You’ll get a 3 second countdown and then BOOM! You will be livestreaming on Facebook showing up in your friends/family/fans newsfeed.
There is a button on the top right of the screen that will flip the camera for you… So you can get creative with how you present your livestream – either selfie style facing you, or away from you while you film something.
During the livestream, Facebook will notify you how many people are watching in real time. You will also be able to see comments and interact with your live viewers.
Although you can’t comment back during the actual Livestream, you can like your viewer’s comments and engage with them accordingly.
Step 3 – Edit Your Video
Now that your Facebook Livestream is complete, it’s time to maximize the performance.
Editing a Facebook Live video is no different than editing a normal Facebook video. Click on your Facebook Live Video, click on options then edit.
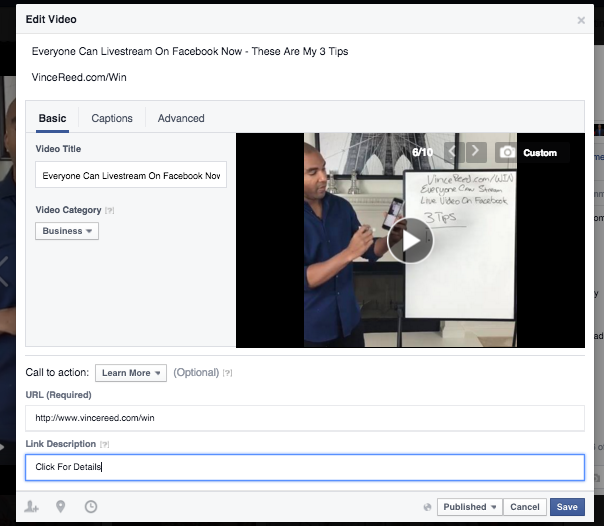
You can choose a thumbnail (Facebook gives you 10 options), categorize your video, add a call to action to your website, and even edit your title/text!
Once all of that is complete, you can really add some juice to your Facebook Live video by going into the power editor and creating a video ad to get more eyeballs on your livestream.
If you are interested in learning more about Facebook Live and how I am leveraging it for my business, click HERE.
I host weekly webinars for my Inner Circle and go into great detail on topics just like this.
In conclusion, Facebook Live will be and has been a major key to my business. We live in an online world and it’s clear to me that video is here to stay… So my best advice would be to take full advantage of Facebook Live!